
Grid Calculator Pro Edition handles your paragraph and character styles with ease. Working with styles created via the plug-in are dynamic (compared with InDesign default which is static), in other words if you change your document leading (unless you're working in Custom Leading) or font size your text will update, this is one of the key benefits of the plug-in except the obvious, creation of layout. Something else that is very powerful and will save hours of manual work is 'Image-lines', more on that towards the end.
Via the plug-in you can create in- and exdents based on the Em-space (font size), the horizontal grid width (based on doument grid) or your own value. Yet again, here the styles are dynamic (unless you're working with custom values). You can also apply tabs based on Em-space or horizontal grid width and those settings are also dynamic.
The styles called: Body Copy #1 (for paragraph and character style) are automatically created upon starting the plug-in. The only style saved in presets is the Body Copy #1 (paragraph style) so if you need to save all styles simply save the document as is instead of saving as a preset.
Please know that you should not rename or delete the prefix '[GC]' in any of the styles (or masters and layers) as that will cause the plug-in to not recognize and load the settings properly.
Before you start editing Body Copy #1 (paragraph or character style) or adding a new style it is recommend that you enter a document leading or setup the vertical grid (basically the same thing but in different setup modes). Otherwise the leading of style will be changed as it will start in a 'Custom Leading' value. By applying document leading the entries for the style leading will also update correctly, otherwise you will only be able to select 'Custom Leading'.
Add New Style
By default the paragraph and character style called: Body Copy #1 will always be created for new documents. To add a new style simply click the 'Add New Style' button.
It will show a dialog like this.
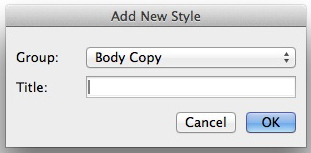
(If you wish, you can enter something in the field called Title, this can for example be "Blue Text" and the purpose with this field is to make it easier to find the correct style when applying and editing).
You can pick between the following from the dropdown (please note that there is nothing "special" with these styles, it's only for naming purposes, it's the same for character styles).
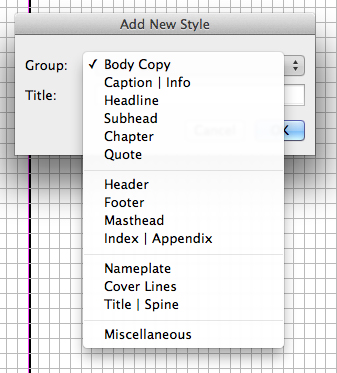
Below you can see an example of how it looks
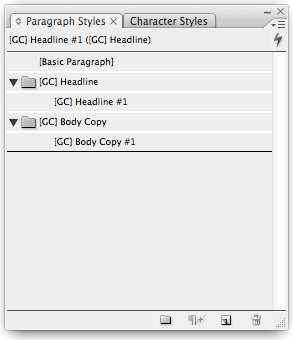
(Do not edit the titles of the folders and styles as those are needed by the plug-in).
Tip 1: If you want to bring forth the style palette you can from the plug-in via the style section hold Cmd or Ctrl key on your keyboard and then the Options button in plug-in will say Palette and when clicked it will bring forth the palette.
Tip 2: If you wish to apply a certain style to a text frame or selected part of text, navigate to the desired style if not already picked in the plug-in dialog and then hold Cmd or Ctrl key and the Reset button (the one in style section not at the bottom of the plug-in dialog) will say Apply and when clicked it will apply that style.
Tip 3: If you wish to clear all styles simply do the same as tip above but use the Shift button and Reset button will say None.
So now that you've learned how to add a new style it's time to learn how to navigate around your different styles. From the dropdown called 'Select Group' you will simply begin with selecting the group (Body Copy, Caption | Info and Headline etc. these are considered as groups).
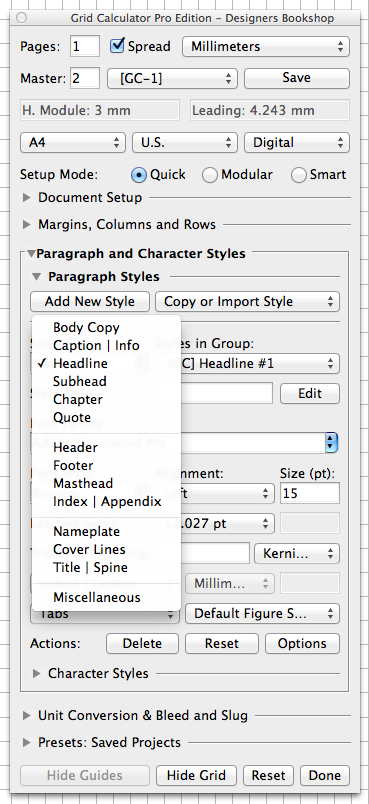
Once you have selected the group it's time to select the actual style from the 'Styles in Group' dropdown.

The plug-in can work with unlimited styles (or however many styles InDesign can handle). In the dialog above we can see that we have 2 styles in the group called Headline. If you wish to edit Headline #2 you would simply pick that from the dropdown called 'Styles in Group'.
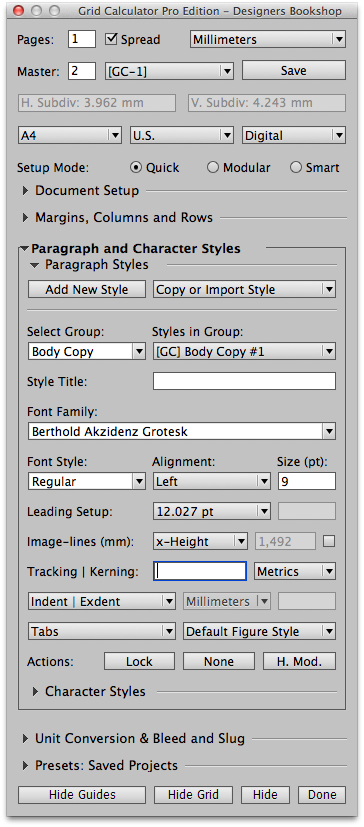
Now that you've learned how to add a new style and navigate around the styles it's time to go back and talk about the basic settings for the styles. Let's first go back to Body Copy #1 in paragraph section. We'll jump to the field called 'Font Family', here we can pick the font family, once we have done that we'll continue to the 'Font Style' section where we can pick settings such as italic, bold and others. Once we are happy with our alignment and font size (in points) we can talk about the Leading Setup which is very important to understand.
For the settings below, the entered desired leading in an A4 document is 12 pt which results in an applied leading of 12.027 unless you uncheck 'Fit Leading' (which would give us 12 pt).
Here I am referring to following setup.

Because we have not done anything "special" with the leading, all values will be multiplied with 12.027 pt as that is the value of the vertical subdivision.
If you would like to apply different leading values that eventually must align I will show you another technique below. This can for example be used for aligning caption text to body copy but where both must have different values to result in pleasing leading values.
What you must understand is that it is very important that we find a common denominator (value). For example if you wish to have a leading for body copy around 12 pt and 8 pt for caption text both these values share the value 4. So we can use that as our base, the way you would setup that in quick mode is through the following settings.
After we've entered 4 pt as our leading we will from the subdivision dropdown select x3 as seen below.
This will create a finer grid, the black square on the image below has a height of 4.009 pt. Between the baselines we have 3 of these squares vertically (4,009 x 3 = 12,027 pt).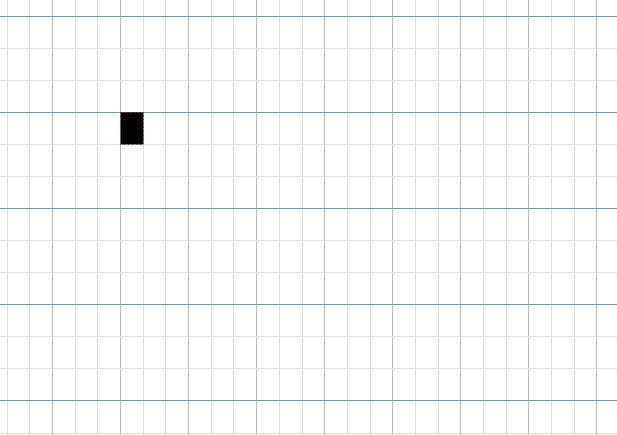
If I would like to achieve the same type of layout but in Modular mode it would look like this.
Please note that in these type of scenarios where you want to achieve certain values vertically, in points (as that is easier when referring to leading) you can change the units to 'Points and Pixels' and document width and height values will be converted to the selected unit.
If we now take a look at the leading entries for styles we have different options and now the 2 different sections in the dropdown makes sense as the top section is based on the value 12.027 pt (baseline grid) and the bottom section is based on the subdivision value of 4.009. Lets add some text to our document to see how it looks.
Please note that the plugin will not apply the style automatic just because you have the text frame selected and the style is active in the plug-in. You can either apply it via the palette or pressing the Cmd or Ctrl key and then the Reset button says Apply (you may need to reselect the text frame again).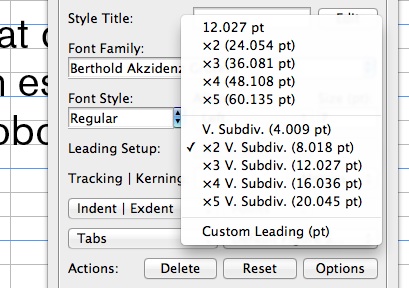
In the image below we can see our body copy to the left with the leading of 12,027 pt and our caption text with a leading of 8.018 pt.
When it comes to your headlines and subheadlines etc. you can experiment which setting works best. If you want to use a value not found in the dropdown you can select 'Custom Leading', this will align the first line of the paragraph to nearest baseline.
If you for some reason do not want the e.g. subheadline to align to any baseline you can create a style outside of the plug-in and set the 'Align to Grid' to 'None'. That option is found within the preferences of the style itself under the section 'Indents and Spacing'.
If you wish to move a style (not possible with Body Copy #1) then click the 'Edit' button as seen below.
This will bring up a dialog where you can edit the title or select which group to move it to.
If you wish copy or import an existing style and use/edit with the plug-in you would select the style from the dropdown next to the 'Add New Style' button.
Please know that making changes to the style, such as character color or other settings not found in the plug-in will not be a problem. Such settings will not affect the plug-in.
Apply image-lines Image-lines are a powerful way of aligning images to your text. When you apply image-lines, the top margin will automatically snap into place. When placing images make sure they align with the image-lines at the top and the baseline at the bottom. That way you get nice alignment at the top and bottom of the body copy text.
You can decide to apply your image-lines based on x or H-height, what you decide is up to you. If you need to enter your own custom value just select 'Custom'. Below you can see the different options you can select.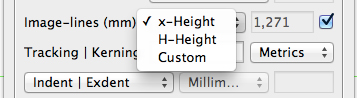
If you select 'Custom' make sure you enter your desired value in the selected unit. The way you extract the value to input when selecting custom is to create a text frame, make sure the correct font, style and size etc. are selected and enter the letter you wish to use the height of. Select the text frame, then go to: Type > Create Outlines. Then copy the value of the height and input it into the field of the plug-in.
If you are using non-latin characters you must use the 'Custom' option (arabic, russian letters etc.).
In the example below you can see that image-lines applied based on the letter 'D'.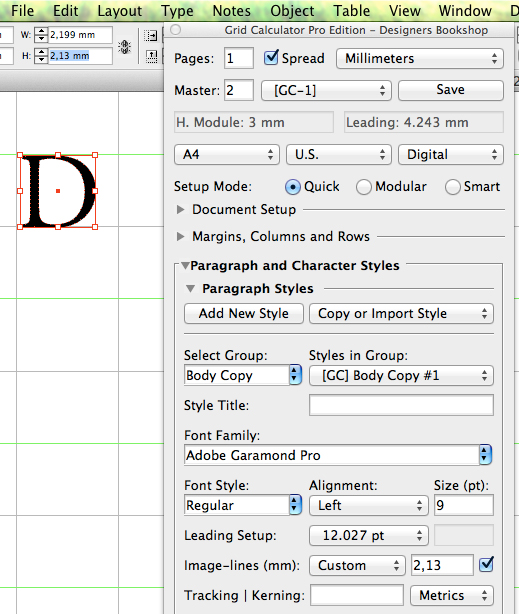
If you want to apply image-lines based on a letter that hangs below the baseline, simply measure from the baseline to the top of the letter. Below you can see how it looks if you simply copy the entire height of a letter that hangs below the baseline.
But if you look at the example below where I have measured from the baseline to the top of the letter the image-lines are placed correctly on the document.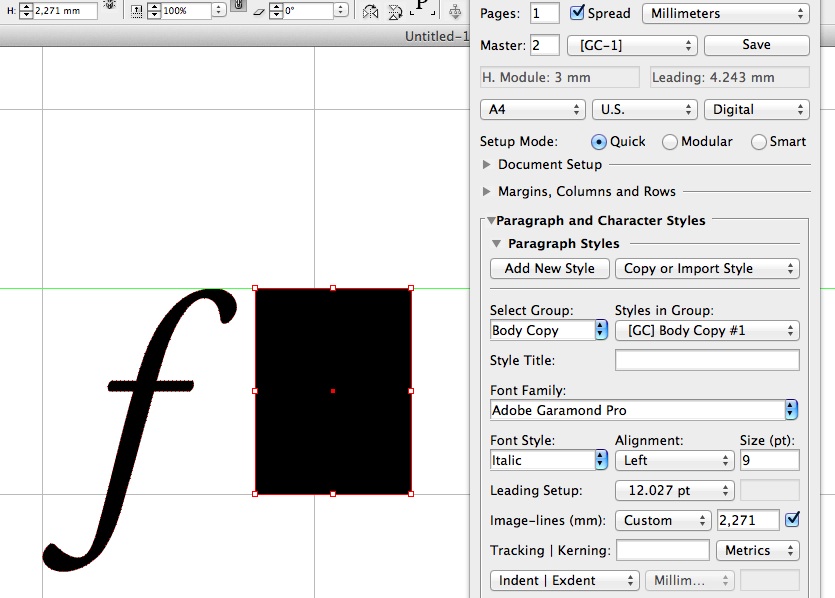
If you must base your image-lines on a letter that hangs below the baseline simply measure from the baseline to the top of the letter and then it should work fine.
Image-lines are actually guides placed in a layer that you can hide or show.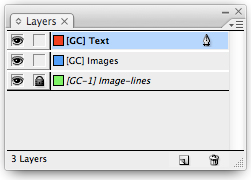
More information:
Video: Paragraph and Character Styles
Video: Square Grid with Image-lines via Quick Mode