
New interface design has been implemented starting from version 4.0.

Smart mode is a new way of approaching layout. It's completely different from what you're use to. The secret with the smart mode is that everything is based on the smallest component of the layout, the subdivision values.
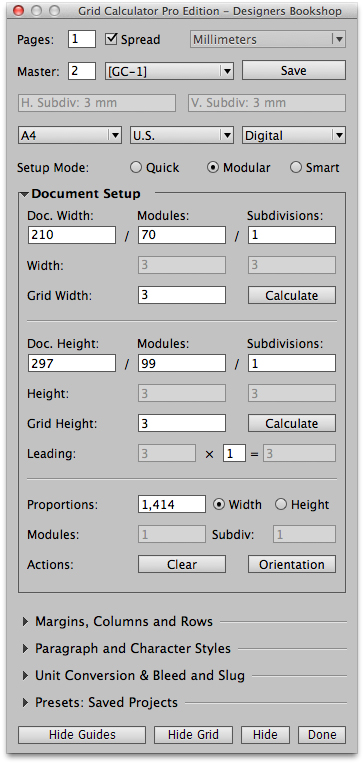
Once the smallest component is defined everything will fit perfectly. It begins with that you setup the document width/height and then the modules and subdivisions. For users that know what values they are after in terms of the grid width and height I recommend using the modular mode together with smart mode.
More exactly, I am referring to the calculate feature. Actually, you can setup your entire document grid in modular mode and then change your setup mode to smart mode if you prefer since the modular and smart mode are designed to work together.
For example if you were to start out with the goal that you would like to have 3 millimeters in width and height for your grid it could look like this in modular mode. Please note in this case the Modules and Subdivisions fields would be empty and we would enter 3 for the Grid Width and Height and then click Calculate for it to calculate the closest fitting value.
Then after you have setup your document as shown in the image above you would go to smart mode as shown on the image at the very top. From here on, you have 2 methods of working with smart mode.
First method
You can define the number of columns/rows you want, in this example I would like to have 12 columns and 8 rows so I enter that into my settings:
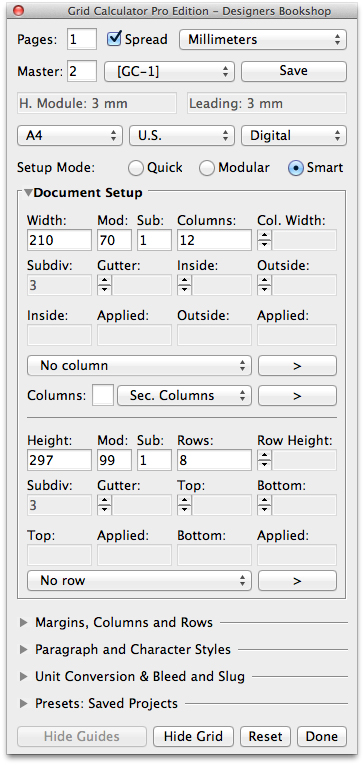
By entering values into these fields (Columns and Rows) the desired margins fields are disabled. The desired margins fields are the fields just above the dropdowns for Columns and Rows (next to the fields called Applied).
From here on you will "build" your layout and all values are based on the smallest components, the subdivisions so it's impossible for anything to misalignment. Make sure to apply the Gutter value in the end after Columns (Col. Width) and Rows (Row Height).
You can "move" the margins and maintain the layout, this is done by editing the arrow-based fields called: Inside, Outside, Top and Bottom.
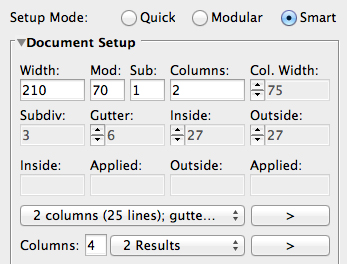
Below the main columns dropdown field we have Secondary Columns which is great if you are looking to create a layout with a certain combination like 2 main columns by 4 secondary columns. What you could do is to enter the number 4 in the field after Columns on the last "row" for Columns section. By doing so you are actually filtering the results to only show entries with 4 columns.
Below you can see that the dropdown shows how many different entries we have for 4 columns (in this case 2 entries).
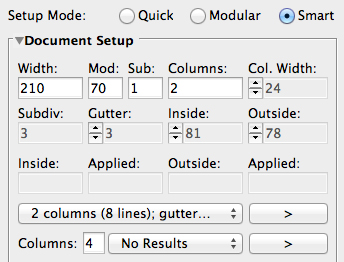
Below we can see that for this specific combination 4 columns can not be applied and it will say 'No Results'.
Second method
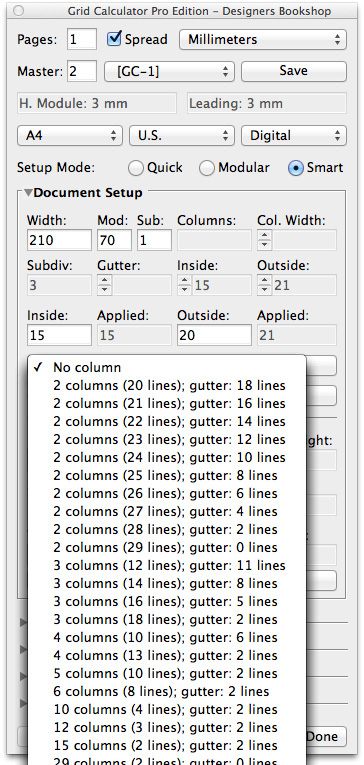
The other method is to enter your desired margins. In this case it's 15 millimeters for the Inside (this value fits perfectly and could be applied) and for the Outside 20 mm (21 mm was the closest fitting value that has been applied). We can also see values entered for the Top and Bottom margins.

From here we can select columns from the dropdown as shown on the image below:
By clicking on the button ( > ) to the right of the dropdown field you can browse between different column combinations. If holding down Cmd or Ctrl the button shows ( < ) and you can browse backwards.
By holding down the Shift button the browse buttons ( > ) will say Clear and when clicked the entries will be cleared.